Why choose Stage 1 Crower Camshaft?
For daily driving usage and for drivers that are looking for more power in their car.
Cam Performance - Street use with emphasis on bottom end and mid range power.
Works with stock springs up to factory rev limiter.
Order parts from - http://www.monkeywrenchracing.com/
Thanks Matt from MWR.
Collected my Crower Cam on Monday 20/06/2011 all the way from LCCT Post Malaysia.
Crower racing stage 1 come with 1 set of camshaft, 2 stickers,
1 tube of camshaft & lifter prelube, and camshaft timing tag. I took off the rear bonnet cover, 4 x 10mm bolt and 4 washers.
( For this task, i strongly recommend you get some help from a assistant by holding
on to the bonnet)
!warning! do not lift your bonnet too high
- Remove the 2 vacuum hose from the valve cover.
- Then, remove the 4 ignition coil sockets.
After removing the above, remove the 4 x 10mm bolt from coil
and remove coil from engine.
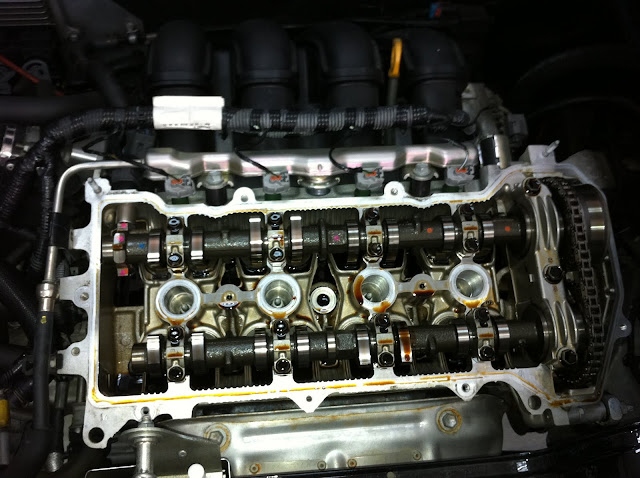
Remove all the 10mm bolt from valve cover and open the valve cover so you will be able to see the camshaft and timing chain.
You will be able to see your camshaft and timing sprocket + timing chain by now.
Then, you need to turn the crank pulley to 0 (Zero) timing to achieve
TDC (Top Dead Centre) for cylinder no. 1.
Turn the crank pulley until 0 (zero) and get the intake & exhaust
sprocket timing mark to align as show on the picture above.
( yellow straight line )
* Check the top cam sprocket timing mark and crank pulley mark before removing the timing chain tensioner. *
Start removing the cam cap according to the sequence below ( 1 to 10 ).
Now, remove the timing chain tensioner from engine. Unscrew 2 x 10mm nut and pull out the timing chain tensioner. The location of the timing chain tensioner is next to your drive belt tensioner damper.
Refer to the visual above: Push-in at the spot illustrated by the orange arrow. Next, press down from above so that you can push and hook the tensioner in place. After this process, you will be ready to re-install.
Arrange the camshaft and cam cap on a table. Now, get ready to swap the stage 1 crower cam.
NOTE :
When re-install the camshaft. put the camshaft cylinder 1 camshaft lobe facing each other like picture showing above. Re-align the camshaft sprocket timing and crank pulley timing before re-fitting the timing chain tensioner.
Re-install all the cam cap in reverse and timing chain tensioner.
After installing the timing chain tensioner, remember to turn the engine clockwise. In between, you will notice some multiply clicking sound (this shows that the timing chain tensioner has pop-out. Then you need to re-check your timing chain tension.)
cam cap torque spec - 10 Nm
timing chain tensioner - 11 Nm
intake & exhaust sprocket torque spec - 45 Nm
Turn the crank pulley 2 rounds and then inspect the timing mark again. If it's align and you feel really confident with your accomplishment, you can now proceed to install the valve cover and start your engine.
Just a reminder, you need to check the valve clearance as well to prevent over/under shim of the cam.


